Categories
Cleaning Tips

4 Apartment Cleaning Tips to Get Back Your Security Deposit

The concept of cleaning service

Whether you live in a rented apartment, condo, or home, you must pay a security deposit before signing the lease. The property managers and landlords use the security deposit to fix any damages and clean the house once the renter moves out.

The good news is that you can still get your money back in full, provided that you meet specific requirements using these apartment cleaning tips.

Property owners appreciate it when you leave their units in good condition. While cleaning can be stressful, there is nothing more satisfying than looking at a sparkling house. 

This article shares apartment cleaning tips to ensure you get back your security deposit. Give yourself peace of mind by hiring cleaning professionals for your move-out cleaning. Contact us for a free quote today.

Apartment Cleaning Tips On Different Areas of Your Home

Move-out cleaning should be stricter than the mother-in-law test if you want to get your deposit back. It is more than simply swiping a finger across a mantel. First, you need effective cleaning supplies to make your job easier and faster.

You can start by dusting ceilings and cabinets, wiping countertops, and sinks, and finally, mopping or vacuuming carpets and floors.

Clean From Top to Bottom

When cleaning your apartment, cleaning from top to bottom is essential to ensure that dirt and dust fall to the ground. It saves you time and energy from multiple vacuuming. The first step to deep cleaning your home is removing cobwebs and dusting. You can:

  • Clear cobwebs from corners and ceilings
  • Dust ceiling fan, light fixtures, and ledges to remove dust and dirt
  • Wipe dust from surfaces such as bookcases, shelving, dressers, doors, and curtain rails.
  • Repaint or remove dirty stains from walls and baseboards
  • Thoroughly vacuum blinds
  • Clean and polish mirrors.

Tackling The Bathroom

Young woman cleaning toilet in bathroom

Bathrooms are some of the tiniest parts of a home but are the least desirable and time-consuming to clean. You must clean the sinks, cabinets, toilet, tiles, and shower. Remember to clean the toilet from top to bottom to avoid spreading germs. Also, ensure to ventilate when using bleach properly.

Here is a step-by-step process of making your bathroom spotless:

  • Use the disinfectant cleaning spray and microfiber cloth to wipe down the sink and counters. Make a paste of vinegar and baking soda to remove stains from the grout.
  • Scrub the tub or shower using vinegar and dish soap to eliminate mold and build-up.
  • Wipe down the mirrors with a glass cleaner and thoroughly polish
  • When it comes to the toilet, you can use a toilet brush and cleaner to scrub the inside and remove hard water stains.
  • Antibacterial wipes are your best friend when it comes to wiping down the toilet seat
  • Finally, clear all the debris from the floor using a vacuum or broom and mop the bathroom floors using soapy water.

Apartment Cleaning Tips for Your Kitchen

The kitchen is one of the most used areas in a home. However, you probably won’t make frequent meals during the last week before moving. This is the best time to start making your kitchen sparkle. 

You can hire cleaning services like TLC cleaning professionals to save you from the hassle of cleaning and make your move stress-free.

Here are our apartment cleaning tips if you prefer cleaning the kitchen yourself:

  • Clear out and clean kitchen cupboard, shelves, and drawers
  • Throw away food leftovers
  • Clean windows and wipe down the frames, sills, and ledges
  • Remove molds and discoloration from the grout, wash and polish the wall tiles
  • Scrub, rinse, and shine kitchen sinks, faucets, countertops, and worktops
  • Scrub and polish gas rings and control knobs
  • Clean the microwave by heating the water and vinegar mixture for a few minutes, and then wipe using a microfiber cloth.
  • Deep clean the fridge using dish soap, vinegar, and water.
  • Take the trash out and sanitize the garbage bins
  • Lastly, mop and polish the kitchen floor.

DIY Oven Cleaning

Hand in glove wipes the microwave inside - apartment cleaning tips

The oven is one of the places that is mostly ignored when it comes to deep cleaning. That means it’s also one of the places likely to deny your security deposit by the time you’re moving out.

The best apartment cleaning tip to make your oven sparkle is using a mixture of baking soda and water to clean.

Baking soda is an excellent cleaning agent because it is mildly abrasive. As a result, it helps eliminate sticky food stains in the oven. It also removes greasy stains and leaves the oven spotless. After washing the oven with the baking soda and water mixture, rinse it using a wet piece of cloth.

TLC Cleaning Services for The Best End of Tenancy Cleaning

As cleaning professionals, we understand how energy and time-consuming cleaning an entire house can be. We provide cleaning services in Fargo, including Grand Forks, Detroit Lakes, Wahpeton, and Jamestown. 

If you dream of walking into an immaculate house without taking the time or effort, TLC Cleaning is ready to help. Call us today for weekly, bi-weekly, or monthly cleaning to keep your space sparkling while you focus on things that matter, like family, career, and friends.


Categories
Floor Care

Tips From the Pros: How to Clean Hardwood Floors

A man hand applying wood care products and cleaners on hardwood floor surface. Shining hardwood floors are a real show-stopper in the interior of a home. However, without proper care, hardwood can become worn, dull, and, even worse, scratched. A busy lifestyle and the call of everyday obligations can make it hard to find the time to invest in maintaining the brilliance of your hardwood floors.  Hardwood floors can be quite an investment, and when they’re not properly cared for, they will wear. That’s why TLC Cleaning has a few tips on how to clean hardwood floors and to keep them looking their best for years to come.  If you find you lack time to invest in maintaining your hardwood, contact TLC Cleaning to keep your floors shining while you’re away. We service Fargo and Grand Forks, North Dakota, and Detroit Lakes, Minnesota. 

How to Clean Hardwood Floors: The Basics

Beautiful, clean hardwood floors in a nicely decorated living room/kitchen. When it comes to cleaning and caring for them, it’s done the same way whether you have pine, bamboo, oak, or cherry floors. However, if you know your flooring type and the manufacturer, it could be helpful to see if there are any additional care instructions available. When caring for your floors, you can follow a formula: sweep, mop, restore. Once the floors are restored to their original sleek beauty, regular maintenance becomes a manageable task.  

Sweep the Debris

Someone wearing blue slipeprs and socks sweeping the floor. Sweeping is the first step of how to clean hardwood floors. The build-up of dirt, debris, and pet hair are the primary culprits of scratching the floor. It’s crucial to remove the debris, especially in high-traffic areas. A few tips to keep your floors dirt-free:  
  • A dry microfiber mop is great for picking up and trapping loose dirt. Or use a regular, soft-bristled dust broom to sweep up. (hard bristles can scratch the floor’s finish)
  • If using a vacuum, make sure to either turn off the beater brush or use a floor attachment. When using the beater bar, you risk scratching and damaging the floors. 
  • It would be best if you swept the floors at least once a week. While a deep cleaning could be necessary for high-traffic areas and common places pets reside.

Mop the Floors

Someone wet mopping with a lime green bucket and mop. Mopping is the second step for how to clean hardwood floors. Once you have cleared the floors from all the loose debris, dirt, and hair, it’s time to start wet mopping. Sweeping won’t clean the dirt or grime that has built up. It may be essential to mop high-traffic areas more frequently than once a week.  A few tips to keep the grime at bay:
  • When you mop the floors make sure you wring out all excess water; you want a damp mop, not a sopping wet, plop mop. 
  • Standing water can cause damage to the wood and can strip the finish.
  • You should clean your floors with a recommended hardwood floor cleaner. These wood floor cleaners are formulated and tested to clean and help protect.    
  • If using a steam mop, make sure it has a hardwood setting. If there is too much heat and steam, it can cause damage to the finish. 
  • Avoid mopping with harsh cleaners. Harsh chemicals will dull the finish of the floor. 
  • Use caution when using any DIY or homemade cleaning solutions containing vinegar and water. Concoctions with a high vinegar content can erode the finish. It’s always best to do a spot test.

Restore the Floor Finish 

Hardwood floors with polish on the left side, and unpolished on the right. Sweeping and mopping won’t rectify dulling or scratched floors. Restoring your hardwood to its former glory will rid the floor of scratches, scuffs, and lackluster appearance. Part of restoring hardwood floors is knowing how to care for them properly.  A few tips on restoring: 
  • A liquid scratch concealer works well to conceal scratches. Once cured, the concealer hardens and protects your floors from future scratches and won’t come off while cleaning. But make sure you get a color that matches your finish as close as possible. 
  • Use a hardwood floor polish to bring back shine and remove micro-scratches. 
  • Read the instructions for the floor polish and go over some Do’s and Don’ts before you get started. 
  •  Try a hardwood floor wax, but do your research. Hardwood floor wax will interfere with the finish of a Polyurethane finish. Check the care instructions of the flooring manufacturer. 
  • Other restoring methods could include scratch repair kits and touch-up repair kits. 

Maintain the Hardwood Floors 

Gorgeous and shiny, well-maintained hardwood floors. Once you have swept, mopped, and restored your floors, the best part is that maintenance is minimal. Once you incorporate taking care of your hardwood floors into your cleaning routine, it should be a breeze.  A few tips on maintaining your hardwood floors:
  • Dry mop or sweep with a soft-bristled broom at least once a week. 
  • Use a recommended hardwood floor cleaner to remove any built-up dirt residue.
  • Mop the floors with a hardwood-safe cleaner at least once a month, but more often for high-traffic areas.
  • Apply a fresh coat of finish to the hardwood floors every couple of years. 

Protect the Floors 

A small area rug place in a high-traffic area of the kitchen to protect from wear and tear on hardwood floors. Protecting your floors from the damaging effects of dirt and other small debris is the best way to ensure you get the most out of your investment.  A few tips on protecting your hardwood:
  • Place rugs near the entrances of your home; this will provide guests and furry friends a place to remove dirt and small rocks from their shoes and paws that could scratch the floors. 
  • Remove shoes and leave them near the entrance to prevent tracking in particles that could cause abrasions. 
  • If you have pets in the home, cut their nails frequently to keep them from scratching the surface. 
  • The floors in high-traffic areas see the most wear and tear. Protecting these areas with rugs will protect the flooring from potential scratches, spills, and everyday traffic. 
  • Rugs also create a barrier between your hardwood floors and heavy furniture. When shifted, heavy furniture can cause gouges or deep scratches in the wood. Alternatively, you can use furniture pads on the bottom of the legs and feet of furniture to protect the wood. 
  • Always clean spills promptly, and make sure they are completely dry.

Learn How to Clean Hardwood Floors from TLC Cleaning

A professional cleaner wearing bright green cleaning gloves mopping a hardwood floor. If you know how to care for hardwood floors, they can last for years and bring warmth and style to your home, but sometimes life is busy, and we fall behind on things like restoring the floor. If this is the case for you, contact TLC Cleaning.  We do the cleaning, so you get back to doing what’s important!
Categories
Cleaning Tips

13 Things to Try and Make Cleaning Fun

A man wearing an apron and pink cleaning gloves flexing and smiling for a portrait.

Most people will tell you they don’t even want to picture themselves cleaning on their days off or after a hard day of work. Your days off are hard-earned days of leisure and fun but, who says cleaning can’t be fun? In this blog post, we will share thirteen ways to make cleaning fun and get back to doing what you love. Leave the cleaning to TLC!

TLC Cleaning would love to help you when you are just too busy doing day-to-day life. We are located in Grand Forks and Fargo, North Dakota, and also Detroit Lakes, Minnesota. 

How to Make Cleaning Fun

A flat lay of cleaning supplies and an alarm clock. Setting a timer is something your can try to make cleaning fun.

1. Set a Timer

When you give yourself a few minutes (10 or 15 minutes will do great) to clean, then give yourself a break, you are much less likely to get overwhelmed.

Here is a fantastic video on how to clean your home daily in only 15 minutes!

Bottles of the TLC Cleaning products

2. Buy Nice Smelling Cleaning Products

If you pick out nice smelling cleaning products that you love, then you may be more likely to enjoy wiping down that counter. Who doesn’t love a freshly cleaned kitchen that smells like their favorite scent?

A woman dusting a shelf with a gray fluffy duster.

3. Pick One Room

Pick one room or one area to work on at a time. When you look at a house as a whole, it can be overwhelming but, just one small room is much more manageable. 

A mom and daughter cleaning a living room together. Tackling one room is a way to make cleaning fun.

4. Get The Kids Involved

If you have children, this is the perfect opportunity to have a little help. 

You can turn it into a cleaning game. Pick a random item in the room and tell the kids whoever put the item away in the right spot gets a prize. The trick is to make sure you keep the item a secret until the end. Watch how fast things get put away!

Click here to see our tips on ideas on how to get the kids involved!

Awoman picking up laundry to tidy a room.

5. Pick Up Certain Items Only

There usually are only a few types of items in a room, trash, laundry, and dishes. When you pick one thing at a time to focus on, it will be much easier. Then, once all of one category is gone, move onto the next type of item. You deserve a break in between, though, so don’t forget to do that!

Smoeone choosing a TV show to listen to while they clean.

6. Put On a TV Show

Having some TV on is always fun. Don’t put on something you need to pay attention to, though. A mindless show would be your best option. 

Couple singing and cleaning while blasting music to make cleaning more fun.

7. Blast the Music

Music always starts a good time, so why not have some on while cleaning your house? You can even have a dance party if you’d like! Who doesn’t love a dance party every once in and while? We sure do. 

Here is a link to a great playlist to get you cleaning and dancing. If you like the 2000s through 2021, you’ll enjoy this!

A woman cleaning her windows while listening to a podcast using bright red headphones.

8. Turn On A Podcast Or Audiobook

Maybe music isn’t your thing, but you can not get enough of your favorite podcast. Maybe your favorite author just released a new book. Load that onto your phone or speaker and listen to that. It will not distract you as much as a movie or TV show you can’t take your eyes off of. 

Click here for a podcast you might fall in love with and use as your dishwashing or folding laundry go-to.

A man sitting on a couch making a cleaning to do list

9. Make a List

Another tip for how to make cleaning fun is by making yourself a list. Make sure that it is super detailed. For example, if you have to clean the living room, don’t just write “clean living room.” 

It will feel like it takes forever to cross it off. You can make your list look like this: clean off the sofa, clean off the entertainment center, clean windows, dust TV, vacuum carpet, fix couch cushions, and rearrange the throw pillows. 

All those items may seem like things that you wouldn’t think of writing down but, once you are done and see how much you have gotten accomplished, you will be so much more motivated to finish and possibly get started on the next room or area.

10. Watch Cleaning Videos

Watching other people clean their homes will make you more motivated to clean your house. Everyone has to do it but seeing that other people put it off will make you feel so much better. You are not alone.

Here is a great video to get you started.

Someone checkign their rate with a fitness tracker watch after cleaning their home.

11. Wear Your Fitness Tracker And Watch the Calories Fall Off

As you are running around cleaning, your fitness watch will track all the calories and all of the steps you take. If you count your steps and try to reach a goal every day, this may help you get there! Not many people think that a cleaning session can burn that many calories, but you actually do if you are scrubbing and organizing. Make cleaning fun by working towards completing your fitness goals at the same time!

A woman singing into her mop handle while she cleans.

12. Perform a Concert

If you are a person who likes music, this is perfect for you! Once you get in the cleaning groove and really get into a song, you will most likely start singing. Belt it out! Let the neighbors feel like they need to pay for a ticket after what they just heard.

Four members of TLC Cleaning team wearing pink shirts and smiling while holding cleaning product spray bottles

13. Make Cleaning Fun and Let TLC Cleaning Do it For You

We offer online estimates to make your life much easier. 

TLC Cleaning has many different services to cater to everyone’s particular needs. 

Just moved in or moved out? We have a service just for that. Are your carpets in need of a good steam clean? We offer that too! 

We also have a 12 point cold and flu buster package that is great for cold and flu season!

We offer many more services to keep your home clean and sanitized, so make sure to get back to doing what you love! It’s time to leave the cleaning to TLC Cleaning!

Categories
Chores

These 7 Chores for Kids Let You Delegate the Housework

Kids emptying the dishwasher. Emptying the dishwasher is a good chores for kids.

If your kids whine and complain about having nothing to do, we have some ideas for you. Check out our list of chores for kids to learn responsibility around the house.

Children of the new generation are often perceived as lazy or lacking the work ethic of the older crowd. Screen time and new technology have children often spending a lot of time on their own, stuck inside. 

Despite this, our children definitely can be hard workers. There are several age-appropriate chores that can help build essential habits and skills that will last them a lifetime. 

Are you spending too much of your precious family time cleaning your house? TLC Cleaning services the Fargo & Grand Forks, North Dakota, and Detroit Lakes, Minnesota areas. 

We offer both basic and deep cleaning packages so you can get back to doing what you love. 

1. Cleaning Produce

A toddler sitting on a counter washing produce.

Having your kids get hands-on with all of the work that goes into meal preparation is really beneficial. Washing fruits and vegetables doesn’t involve hazards like knives or hot stoves, so very young kids can participate. 

With the younger kids, this can help promote their fine motor skills. You can also introduce them to bigger words as their vocabulary grows, like ‘cucumber’ or ‘asparagus.’ 

Even when you’re busy meal prepping, you can use this time to quiz them on the different colors of foods. 

School-age kids will be familiar with the kitchen and become more independent at an earlier age. Being in the kitchen will teach them the necessary steps to prepare themselves snacks or meals down the line. 

2. One Of The Best Chores For Kids: Cleaning Up Toys

A mom and child cleaning up toys together.

Another example of simple tasks for a very young child is picking up their toys after they’re done playing. As they develop hand-eye coordination, make sure you don’t get stuck in the habit of tidying up for them. 

Teaching them to clean from the very beginning automatically reduces your workload. It also shows toddlers that nobody else will swoop in to clean up the mess they created. 

Even though toddlers might not be able to do it all themselves, you can take advantage of their enthusiasm. Their positive attitude will enforce the idea that this is not a punishment but can actually be a great time.

We don’t want our children associating chores with punishment. Instead, you’re giving kids a valuable lesson about important life skills.

CEO Trisha Lake has this to say,  “I always recommend having a set number of chores per day before they can play. Then have a list of chores they can do.”

3. Cleaning Baseboards

A small blonde toddler using a cleaning bucket and gettign ready o clean baseboards.

Mama, is your back hurting from constantly bending over trying to clean those hard-to-reach places? It’s ok to take advantage of your kids being smaller than you and have them help you out.

You can spray the baseboards ahead of time and give your preschool-age kid a wet washcloth to wipe everything down. Click here for more tips to help get your baseboards clean.

4. Taking Care Of Pets

A boy taking care of his pet iguana by feeding him.

Pets are something every child seems to want. Naturally, the care of that pet belongs on your list of chores for kids. 

How many times have you heard the dreaded phrase, “Mom, can we get another puppy?” Taking care of animals is important, and it’s great to show children aged 5-6 what this responsibility looks like. 

Have kids scoop their dog food both morning and night. Make it a priority that the kids feed their pets before sitting down for breakfast and dinner. 

Even kids who aren’t tall enough to reach the sink to refill the water bowl can help. Have them check and let you know when it needs to be replenished. 

If your backyard is fenced, have your school-age child let the dog out on a schedule.

5. Yard Work

Two small children watering flowers. Yard work is one of many great chores for kids.

Outdoor chores for children can be fun, or they can be absolutely boring. 

Do you remember picking up leaves in the fall as a child and how it seemed to drag on forever? Picking up leaves is not a one-man project and is typically done by the whole family. 

An older child (7-9) will learn the importance of teamwork, which will benefit them both at home and at school. Show your appreciation for a job well done, so they don’t wind up dreading this type of work.

Believe it or not, yard work can also be enjoyable. 

Kids can explore the basic pleasures of playing with both water and dirt. This can vary from planting seeds to watering flowers or even pulling weeds. 

6. Washing The Car

A family of four washing their red van.

Take a sunny afternoon and get your children set up with a bucket of water, some soap, and a sponge. Get some good jams playing on the speaker, and kids aged 10-12 can successfully wash the car. 

Road trips are an absolute blast for children in this age group. 

Still, cars have to be adequately maintained for them to function correctly. Having kids wash the car by hand will open their eyes to the idea of car maintenance.

7. Help Paying The Bills

A mom teaching her young daughter baout money and how to budget

You might’ve read this one and thought, “there’s no way my child is chipping in to keep the lights on.” Luckily for you, that’s not quite what we were referring to. 

In schools, kids are taught things like Algebra and essay writing. Still, many don’t know how to balance a checkbook upon graduation. 

Financial knowledge is something we as parents must take responsibility for in terms of educating the next generation. Sit down with your teenager and show them the process of how bills get paid. 

They will be able to use this skill as soon as they move out, or maybe even before. Basic budgeting is also a helpful skill, especially if teens have a part-time job. 

Now That You Have Some Ideas, It’s Time To Delegate Those Chores For Kids

A daighter and dad working together to clean their kitchen

Get back to what makes you happy and give TLC Cleaning a call. We service the Fargo & Grand Forks, North Dakota, and Detroit Lakes, Minnesota areas.

Categories
Cleaning Tips

How to Clean Your House Cleaning Tools

A bucket filled with house cleaning tools.

Tools can only work if they are maintained and kept in top shape. It may seem redundant, but house cleaning tools are no different. 

To clean your home, you need to have house cleaning tools that are also clean and in good shape.

If dusters, mops, and cleaning machines aren’t kept up, they can actually be harmful to your well-being. Dirty tools can re-deposit dirt and grime, making your home more contaminated than before. 

That’s not very sanitary either, meaning that you can potentially leave your household ill. 

As a cleaning company, we take the maintenance and cleanliness of our tools very seriously. 

We want our clients to have clean homes and commercial spaces that they feel safe in. Keeping up with our tools is one of the best ways to accomplish this. 

If you don’t want to get your hands dirty, leave the cleaning to us! TLC Cleaning offers a variety of basic and deep cleaning packages to meet your needs.

We also offer other services, such as a move-out cleaning. You can find us in Fargo and Grand Forks, North Dakota, as well as Detroit Lakes, Minnesota. 

Contact us today for a free quote! Keep reading for more about how to keep your cleaning tools ready to go. 

Keep Your House Cleaning Tools Clean

A green bucket filled with house cleaning tools as someone mops in the background.

As we’ve stated, keeping your cleaning tools clean is vital to the upkeep of your home. 

This can happen no matter what cleaning products you are using. 

Imagine spending your time and effort mopping your kitchen or bathroom to be sure that it gleams and is clean. Your floor looks fantastic, but if your mop isn’t clean, then all you’ve done is redistribute dirt and germs. 

We can’t imagine anything more frustrating. 

These are our recommendations of how to clean your mop, cleaning brushes, brush heads, and other house cleaning tools. 

Mops 

Someone mopping in yellow cleaning gloves and yellow rain boots.

Not all mops are created equal, and there is a way to clean each kind. Mops are an essential cleaning tool in your arsenal, and floor cleaning is easier when they are also clean. 

Removable cotton or microfiber cloth mop heads 

  • Toss mop head in with a load of towels. If these towels are white, add a ½ cup of bleach to keep them white and disinfect the mop head. 
  • Use a heavier-duty detergent like Tide or Persil. These will give a great clean, and they smell amazing. 
  • Turn your washing machine to the hot water cycle. That setting is great for killing those germs that live on our floors. 
  • Hang your mop head to dry, and do not reattach until it is completely dry. 

Non-removable fabric mop head: This may seem like a hard-to-clean tool. This type of mop is not only easy to clean but doesn’t take much time to do so.

  • In a large sink or bucket, add two tablespoons of heavy-duty detergent or pine cleaner to hot water. 
  • Soak the mop head for 15 minutes, moving it around to loosen grime. 
  • After rinsing thoroughly, hang your mop to drip dry.

Sponge mop head 

  • Rinse well in water 
  • Soak for 5 to 10 minutes in a solution of 1-gallon hot water and ½ cup chlorine bleach 
  • Rinse completely 
  • Air dry 

Dish and Other Cleaning Brushes 

A dish brush with sponges and dish soap.

To keep your dish brush clean and sanitary, wash once a week. We love these methods because they are quick and easy. 

  • Place scrub brushes in your dishwasher and wash them in a regular cycle.  
  • Other house cleaning tools can benefit from a trip through the dishwasher as well.
  • If you would like to clean your brush by hand, use hot water and a white vinegar solution. 

Toilet brush

Someone wearing a yellow rubber glove and holding a toilet brush.

We know this isn’t the most fun thing to clean, but a clean toilet is a happy one. It’s often overlooked, so clean the toilet brush regularly.

  • Add a splash of pine cleaner to the toilet brush holder or container.
  • After each use, place the brush in the solution. This will not only keep your brush clean but will deodorize it as well. 

Dusters (Feather, Microfiber, and Wool Fiber)

A woman dusting with a yellow microfiber duster.

  • Dusters should be cleaned after every use. 
  • Take your duster outside and shake it for one minute. This can work out some stress, and more importantly, shake out the dust. 

To really knock out the built-up dust and dander, tap the handle of your duster against a firm surface. 

  • In a bucket of warm water, add a small amount of dish soap. 
  • Swish duster through water for 1 to 2 minutes. 
  • Rinse your duster until the water running through it is clear. 
  • Squeeze out any excess water and hang dry
  • Fun Part: To return your duster to its fluffy glory, rotate between your palms until it fluffs up.

Clothes dryer lint trap 

Some holding the dryer lint trap, covered in lint.

An important place to clean that gets overlooked is the dryer lint trap. Over time, the dried-out lint can catch fire, making it a dangerous situation. 

  • Remove your lint trap and wipe clean. 
  • Once removed, take a paint stir stick and wrap a microfiber cleaning cloth to the end. 
  • Use the stick to move the cloth around the empty space from your removed lint trap. This will remove any built-up dust or leftover lint. 

Brooms

A woman wearing an apron and singing into a broom while sweeping.

Pro tip: When you store your broom between uses, hang the broom without the bristles touching the ground. This will keep the bristles from bending up, maintaining a crisp edge that will keep your broom ready to go. 

  • Tap the broom and run bristles over a hard edge or outdoor step. This will remove trapped dirt. 
  • Mix two teaspoons of dishwashing liquid to one gallon of hot water and swish your broom through. 
  • Rinse thoroughly with cold water 
  • Hang with bristles down to completely dry

Let Us Clean Up

A blue basket filled with house cleaning tools. 

We hope this has been a guide to help keep your house cleaning tools in tip-top shape. Knowing that what you are cleaning is actually clean can give great peace of mind. 

It is a matter of hygiene, and let’s say it, a fabulous-looking space.

One of our goals from the beginning has been to provide clients with a service that is above and beyond their expectations. Whether you need a final clean for an apartment or a deep clean of your home after an illness, we are here. 

Go to our site today for cleaning hacks, services, and a free quote!

Categories
Cleaning Tips

Learn How to Clean a Room in 5 Minutes

A women holding a large clock in front of her face symbolizing how to clean a room in 5 minutes.

The text pops up saying, “I will be stopping over to drop something off. See you in about 5 minutes.” Panic immediately sets in as you look around your house. Your house looks like a disaster due to working from home, kids everywhere, and no time to clean! You realize that you don’t know how to clean a room in 5 minutes!

No time for a cleaning person to take over (but when you do have time, get a free quote from the experts at TLC Cleaning). Now what? It’s time to learn how to get a 5 minute clean done, with the clock starting now. 

How to Clean a Room in 5 Minutes: Set the Mood and Assess

Someone turning off the TV with a remote in preparation to learn how to clean a room in 5 minutes

You want this to go quick and not get distracted. The first thing is to turn off TVs, computers, etc. Flip on some music and light some scented candles. The proper mood will immediately help you move along.

If you lack candles, put 1 cup of water in a pot on the stove and add some aromatics (cinnamon, cloves, nutmeg or rosemary, sage) and bring to a low boil.

Now take a quick assessment. 

Which room will your company see? Close the doors off to the others. Generally, the kitchen, bathroom, and living room are your primary targets. Start in the room that needs the most help.

My Design Rules suggests starting with a trash pick-up in your target rooms. At the same time, gather any dirty dishes from the other rooms and bring them to the kitchen. If you have a lot of cups and plates lying around, utilize a large bowl or basket.

You will be amazed how that helps right away! 

Kitchen Clean-Up

A sink full of dirty dishes that need to be washed.

If you have a dishwasher, load it up with all your dirty dishes. Unload the dishwasher if it is full of clean dishes. 

Some do not own a dishwasher. In that case, put a cookie sheet in your oven and stack dishes to hide if you don’t have the time to handwash. Just do not forget to take out after your guests leave!

If all else fails, fill the sink with hot soapy water and hide the dishes under the bubbles. 

For any dishes out on a drying rack, put away. Wipe down the stovetop, backsplash, and counter. For items on the counter, put in drawers, fridge, or microwave (a sneaky hiding spot).

Decluttering the kitchen is quick and has a high impact on looking clean.

Finally, sweep the floors. Set any garbage by the outside door to take out after the completion of the swift clean.

Conquer the Bathroom

Someone wearing rubber gloves and spray a bathroom sink to clean it.

You can do this quickly! Pick up any wet towels, fold and hang or put them in the laundry hamper. Put any makeup, brushes, jewelry in drawers or cabinets. Again, the goal is to appear decluttered.

Spray down the sink, faucet fixtures, mirrors, and outside of the toilet.

Hopefully, you have a scrub brush for your toilet. Do a brush down and if you have a cleaning tablet to put in the tank (the ones that make your water blue), add it in. Sweep, mop, or shake the rugs out (outside, of course).

Poof, your bathroom is not now sparkly clean. 

You Live in Your Living Room

A young man with facial hair puttign a book back on a shelf to tidy up a living room for guests.

The living room is likely the messiest room, but also is the most forgiving by your company. After all, we all live in our living rooms!

Grab a laundry basket (or box) and a bag. Put all large items that do not belong in the living room in the basket. Put all the things that need sorting (mail, magazines, paperwork) in the bag. Stash in basement, closet, or garage. 

WikiHow suggests in a pinch, stack items in an out-of-way place and cover with a blanket.

Store items back in their proper place; books on the bookshelf, coasters on tables, rugs straightened. Grab a dust cloth (or a lint roller) and wipe off the most visible items (coffee table, end tables, lampshades).

Fold any blankets and put them on the back of chairs or couches. Straighten up cushions or pillows.

Vacuum or sweep. If you have time, wipe down the floorboards.

A fun and easy idea for your wood floors is to put on old socks and spray the bottom with cleaner and dust the floor as you move around. This method also works on dirty kitchen floors. Make sure the socks do not have holes if you use any irritating chemicals! 

Bedroom

An elderly woman smiling and making her bed as as tep for cleaning a room in 5 minutes.

If you can not shut off your bedroom door or your guest will be in that room, first, make your bed. Hospital corners are a godsend so learn how to make them! Check to make sure nothing is poking out from under your bed and if it is, shove it under to be out of the way, 

Toss all clothes into hampers or the closets (you can sort clean clothes from dirty clothes later). Straighten the top of dressers and night tables. 

If you have large amounts of clutter, use the bag and hide method—finally, vacuum or sweep. 

The Last Check

A person changing the trash bag in a small trashbag and putting it back where it belongs.

Bring out the garbage and shut all closet doors. If you have a pot of aromatic simmering, turn off the stove and walk the pan around the house. The scented steam will freshen up the rooms and then pour down the sink and stash the pot.

If it is daytime, open shades and pull back curtains. If it’s nighttime, turn on the lights. Mood lighting always makes your house look inviting!

Bonus Time

A coffee pot brewing coffee for guests.

Suppose you have some time to spare, clean yourself up. A quick shirt change and a brush will do wonders.

And another bonus time idea, brew a pot of coffee or set out wine and glasses, along with a snack tray. It can be as easy as a hunk of cheese and a plate of crackers. Nothing is more welcoming (and distracting) than drinks and food!

Prepare for Next Time

A professional cleaner wearing clubs and wiping down a bedroom side table.

Congratulations! You learned how to clean a room in 5 minutes! Now, how to avoid the mayhem next time? Hire a cleaning professional!

TLC Cleaning experts offer different packages to fit your needs. Flu Buster, deep cleaning, basic cleaning, or move-in/out cleaning are all our specialties. Check out our easy online estimates.

Once TLC Cleaning has tackled your house, the amount of time cleaning reduces from a 5-minute clean to be a ten-second tidy!

Categories
Carpet Care

How to Get Nail Polish Out of Carpet

Red nail polish tipped over and spilled on to carpet.

The worst thing imaginable just happened; you spilled nail polish on your carpet while painting your nails. You start to panic and think, “how do I get nail polish out of the carpet?”. 

Nail polish, no matter what color, is one of those things that make your heart palpitate when you think of the possibility of getting it on your carpet. Or one of your favorite rugs.

First, don’t panic. We are here to help you abolish that nail polish stain from your carpet or beloved rug. 

If you have a dried nail polish stain that won’t budge, contact  TLC Cleaning to get the job done. We will get your carpets clean and stain-free while you finish your polish job.

How to Get Nail Polish Out of Carpet: Blot Don’t Smudge

Some wearing a pink rubber cleaning gloev trying to figure out how to get nail polish out of carpet

If the spill just took place, grab some paper towels and gently blot up any excess nail polish. Take care not to smudge, scrub, or smear the remaining nail polish. Doing so will only spread the existing stain and drive it further into the carpet fibers. 

If the polish is already dry, use a dull knife to scrape off excess before bringing out the cleaning solutions.

Always Do a Patch Test

A man doing a patch test on his carpet when figuring out how to get nail polish out of carpet

Testing your solution and assessing what it does to your carpet or rug is essential when choosing a cleaning solution. 

No matter what solution you use, you should do a patch test on your rug or carpet first. It is best to do a small, barely visible area for the test. If you see any color transfer on your clean cloth or discoloration, change your solution.

Try Pantry Staples Vinegar and Baking Soda

Vinegar and baking soda with a sponge and yellow, rubber cleaning gloves.

You read that right; in some cases baking soda and vinegar can be a solution for how to get nail polish out of carpet, depending on the type of carpet you have. 

Vinegar: Use plain white vinegar and soak the stain entirely. Once saturated, place a vinegar-soaked paper towel over the stain and let the solution sit for ten minutes. After ten minutes of soaking in the solution, gently blot the area until the stain is removed. 

Baking soda: Generously sprinkle baking soda onto the polish stained area. Once covered, soak the area with club soda and allow the mixture to sit for ten minutes. Then gently scrub and blot the stain until lifted. Once removed, rinse the area with warm water and rag or a carpet cleaner.

Common Household Cleaners 

Depending on your carpet, baking soda or vinegar might not do the trick. If this is the case, two common household cleaners have shown results: Windex and Goo Gone.

Good Ol’ Nail Polish Remover

A woman pouring blue nail polish remover on to a cotton round.

Before you grab your 100% acetone nail polish remover and slosh it all over the stain, there are a few caveats. Acetone is a powerful solvent that can potentially chew through the fibers of your carpet or leave it discolored. 

You want to use a small amount of the non-acetone, dye-free nail polish remover. This solution can be very effective on light or white colored carpets. 

Apply the solution to a corner of a cleaning cloth, cotton ball, or paper towel and gently dab the stain. Be mindful not to scrub the stain into unaffected areas. 

(Pro Tip: Nail polish remover is most effective on a fresh stain, so be quick. Don’t forget your patch test!) 

Products You Can Find in Your Bathroom

A woman reading the back of a hairspray bottle

Time to check under your bathroom sink. Your solution for how to get nail polish out of carpet could be there – hairspray and rubbing alcohol. 

It’s important to note these solutions work best on dried stains. Dampen the stain with cold water, generously spray with hairspray, and follow up with about three splashes of alcohol. 

Once you apply the solution to the carpet, gently scrub with a toothbrush for about sixty seconds. Slowly add more water as you scrub. Once you notice the stain is lifting, blot dry. 

Does the Color of the Carpet matter?

Carpet samples of different colors

As a general rule, different solutions work best depending on the color of your carpet. But this is why it is crucial to do a patch test to see for yourself. 

Dark: For dark carpet, it is better to use hairspray and rubbing alcohol. Using nail polish remover, you may risk bleaching your carpet. 

Light: As mentioned earlier, non-acetone nail polish remover works best on light or white colored carpets. Just make sure you’re using one that is dye-free, or you’ll risk dying your white carpet!

However, no matter your carpet’s color, it is important to keep them stain-free and clean to keep your home warm and healthy!

Kitchen Dish Soap

Purple dish soap being poured out of the plastic bottle

You can mix up a small amount of dish soap with water, but this method is best when combined with one of the other solutions. The smell of the dish soap will help combat the strong odors from the other solutions. 

If you are going to use dish soap, make sure there is not an excessive amount of bubbles in the mixture. The bubbles and surfactants in the soaps will make it hard to see if the stain is being lifted. 

Stubborn Stains Got You Down?

A man frustrated with stains in his dirty laundry

The truth is that there are just some stains that are better off left to the professionals. Depending on the fibers of your carpet and the size of the stain, you may struggle to lift the stain yourself. 

If you’re in the Fargo, Grand Forks, North Dakota, or Detroit Lakes, Minnesota area, TLC Cleaning can help with stubborn stains. Let us do what we love and worry about those impossible stains for you!

Contact us for your free cleaning quote today.

Categories
Cleaning Tips

How to Get Crayon Off the Walls

Someone wearing a yellow rubber cleaning glove using a sponge on crayon on the walls.

“I don’t know how to get crayon off the walls!” is typically something every parent finds themselves wailing at some point in their child’s toddlerhood (and beyond!)

We get it—you come home from work, your littles meet you at the door radiating pride at their artwork for the day. You follow them through the house in happy anticipation of their artistic genius, and then you round the corner to see the kids have made your walls their canvas. 

UGH! Now what? After you grit your teeth through praising your little lovely’s creation while strongly suggesting they use paper next time, how do you get your walls back?

The good news: you don’t have to buy a fresh can of paint every time an enthusiastic or naughty child draws on your walls.

TLC Cleaning has all of the hacks you need to keep your walls clean and crayon-free. Plus, if the stress of house chores gets in the way of family artwork time, you can call us to handle the clean-up for you. 

Contact us today, and we’ll be in touch to schedule a customized consultation so we can relieve all your cleaning stress without delay. (And may we suggest booking an art camp for your little ones so once your walls sparkle again, they stay that way?)

Glamour “don’ts” for crayon cleaning

A little boy using crayons to color on a wall.

Since crayons come from wax, it’s key to understand how not to clean up these marks on your walls. Wax is water repellant, and regular soap and paper towels won’t even make a dent in the markings. 

Further, it’s crucial to choose a cleaning method to remove the crayon without causing damage to your walls. 

If you have high-quality, durable paint, you can perhaps get a little more aggressive with your cleaning methodology. But, we recommend starting gently and amping up the cleaning intensity by degrees until you hit just the right touch to restore your walls to pre-child standards.

Cleaning agents for how to get crayon off of the walls

Someone cleaning crayon off of the wall with a cleaning eraser

Surprisingly, you may have several cleaners handy that answer the question of how to get crayon off the walls. Check your cabinets for the following:

-Toothpaste: First, be sure it’s not the “gel” kind of toothpaste. You’ll need an opaque paste and a sponge, toothbrush, or small cleaning cloth. Apply some paste directly on the crayon mark, and use a little elbow grease to rub the wax off the walls. Once you remove the stain, give the wall a few swipes with a damp cloth to get rid of the paste.

-WD-40: While this agent may live in your garage or basement instead of your cleaning cabinets, it’s super effective on crayon and other wall stains. Test a squirt on a less visible part of your wall to be sure it won’t damage your paint. Generally, WD-40 won’t harm wall finishes.

-Vinegar: This pantry staple can come in handy for a multitude of cleaning challenges, including crayons. Bonus: there are no harsh chemicals in this option, and it’s environmentally friendly. You can put some undiluted vinegar in a spray bottle and spritz it directly on the crayon marks. 

Pull out a toothbrush and scrub gently until the crayon wax and color come off the wall. Maybe plug your nose too, and keep some windows open, so you don’t get overwhelmed by the pungent vinegar smell. Don’t worry, it’s temporary and harmless, and the cleaning results from this simple compound win every time!

-Cleaning erasers: These cleaning tools are a handy light abrasive and scrubber all-in-one. Dampen the eraser under the kitchen or bathroom faucet for a few seconds, and then start scrubbing the crayon marks. (Pro tip: test out the eraser on a small area of the wall first, as cleaning erasers may leave a visible spot on some wall finishes, especially flat-finish ceiling paint.)

-Baking soda: Ah, the universal cleaner, right? Most people have at least one box of baking soda in the pantry. Mix a few teaspoons of baking soda with a few teaspoons of water until you create a thin paste. 

Apply the paste to the wall stain, and grab that handy toothbrush again to gently scrub out the marks. Since this method is a bit more abrasive, be careful not to scrub too hard or too long, especially on glossier paint surfaces like satin or semi-gloss. (Also, we recommend getting a dedicated toothbrush for cleaning and a separate one for your teeth!)

-Turpentine: Typically used to clean up after painting with oil-based paint, this solvent can be effective on crayons too. Once more, do a test patch before getting at the stain with scrubbing. 

Safety first: Turpentine has harsher compounds than some of the other cleaning agents in this list. Be sure to ventilate your space and use gloves when handling turpentine. Kids should NOT help if this is the cleaning agent you choose. 

What about when my kids use markers (gasp!) on the walls?

A girl drawing on a wall with marker

If you can catch marker stains while they’re still wet, you may be able to spray a gentle cleaner on them and wipe them away with a cloth. 

If marker stains dry before you discover them, try dabbing a little nail polish remover on the mark. After letting the nail polish remover sink in for several seconds, you can wipe the stains away with a damp cloth.

On the prevention side, include washable crayons and markers in your next art supply purchase. You can even pick up a set of colorful tub-time crayons! You can then turn your littles loose on the bathroom walls during their next soak and then splash the drawings away when you drain the tub. 

Don’t forget to take pictures of the washable wall art so you can still have the memories without the massive cleaning headaches.

Call TLC Cleaning for all your scrubbing frustrations

A cleaning team cleaning walls.

When you’re already running on physical, emotional, and mental “empty,” the last thing you want is to clean extra messes in your home or business. Trust the professional team at TLC Cleaning to expertly pick up where your tidying and cleaning energy and motivation leave off.

Contact us today for a free consultation and service quote. Whatever your cleaning needs may be, we’ll serve them efficiently and with pride in the Fargo, Grand Forks, and Detroit Lakes communities.

Categories
Kitchen

How to Clean a Glass Stovetop

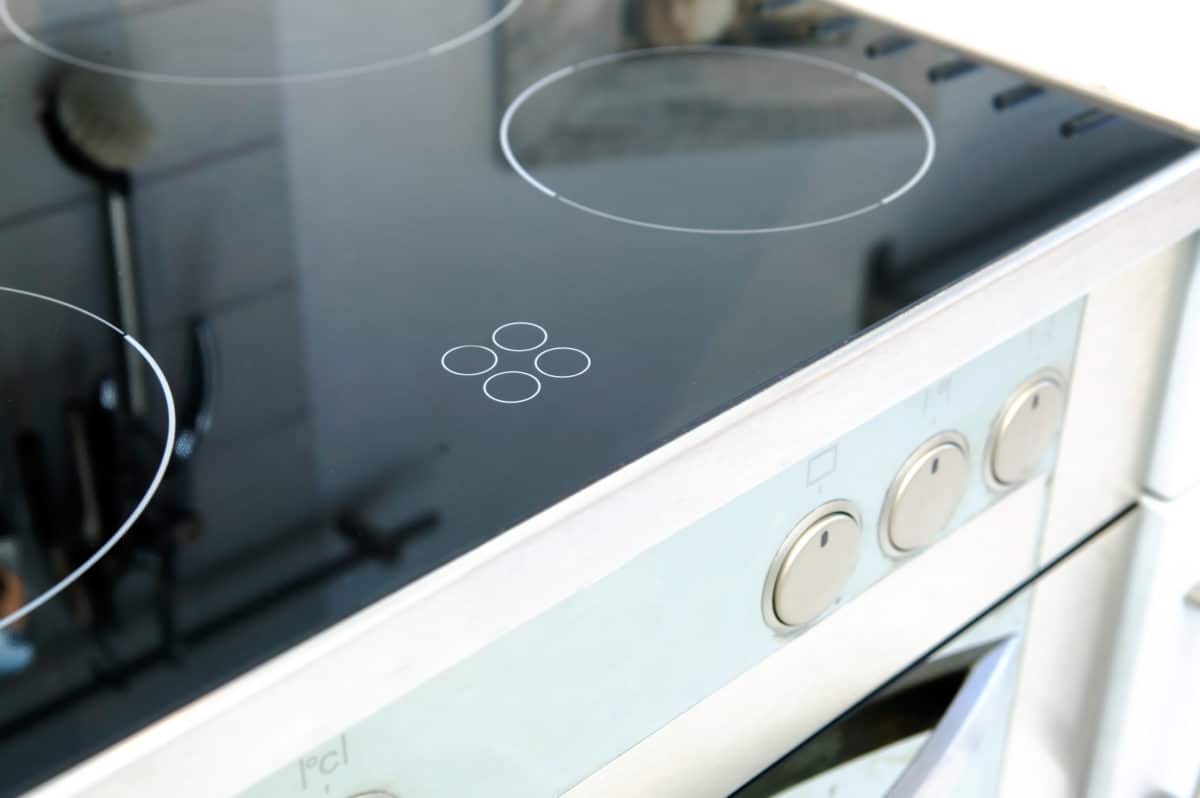
A sparkling clean glass stovetop

For most of us, cleaning the house is not a favorite pastime. However, when you are the proud owner of a glass stovetop, it becomes more important. Learning how to clean a glass stovetop should not make your knees knock. 

Why bother with glass? They are so much more pretty! There aren’t the metal divots you’re constantly covering in aluminum foil or scrubbing because a pot boiled over.

It is like having a new Maserati, or so you’ve heard. It’s gorgeous when it’s fresh. Once you’ve used it, driven it around a while, the shine is gone.

Our team at TLC Cleaning can handle all of your tough and delicate cleaning needs. 

If you haven’t mastered this skill or any other housekeeping one, find us at one of our convenient locations close to you: Fargo & Grand Forks, North Dakota, and Detroit Lakes, Minnesota.

You want to keep your glass stovetop looking fabulous. You want it to look like you belong in a home magazine. 

Between cleanings by the professionals, you can keep your glass looking shiny and new with a few tricks you’re going to learn here. 

There are dozens of articles on how to clean glass stovetops. But, if you want real trade secrets, TLC Cleaning will give you the best tips for how to clean a glass stovetop if you simply keep reading!

The first thing that comes to mind when you hear the word “clean” is work. You know, the old elbow grease kind of work.

While any cleaning requires some effort, you can get and keep your glass stovetop spotless without needing a hot bath to relax your muscles afterward. 

Learn How to Clean a Glass Stovetop

A spotlessly clean glass stovetop

First off, do not clean a stovetop of any kind while it’s hot. Many stories from ER’s across the world have taught us it should be completely cool before touching it.

After it has cooled a little, wipe up messes as soon as you can. The longer they stay on, the harder they are to clean off. 

If you only have some condensation spots, then hot water and a towel will do the trick. For heavier duty cleaning, let’s dig further into the world of aprons, sponges, and mops. 

If natural is your preferred method, start with vinegar and baking soda. You won’t end up with a volcano, but you will end up with a cleaner stovetop!

For a spray, mix 50% white vinegar with 50% water. Spray it on the surface and wipe it off with a soft cloth or paper towel. 

If you have a stubborn spot, try dropping some undiluted vinegar directly on it and letting it sit a couple of minutes. Wipe it up, then repeat the first step. 

If you don’t want to leave a mess, but you also don’t have a lot of time, try using baking soda. Sprinkle some of the all-around good stuff on the stovetop.

Add a little warm water to the soda to make a paste. Cover it with a warm damp cloth and let it sit for a half-hour or so.

When you come back to the stove, use your cloth to wipe off your paste. If you have any stubborn spots, try adding some drops of vinegar to break them up!

While you have the baking soda sitting, you can be taking on other chores in the house. Here’s a post about our least favorite one, dusting!

Back to the glass; be wary of products with scrubbies. You know, little plastic beads or crushed nuts, or some other additive-type that’s supposed to help remove sediment. 

Glass is beautiful! Don’t scratch it!

There are a myriad of cleaners in any store. You can choose from multipurpose, glass only, or rain from heaven. That’s only by special order. 

There is always the Greek way of cleaning if you follow the Portokalos family from my Big Fat Greek Wedding. Spray Windex on everything!

Seriously, though, you can spray the cooktop surface with a cleaner like Windex or any other brand. Wipe with a paper towel or microfiber cleaning cloth, and you’ll see yourself in a minute. 

Big Problems

Dirty and Damaged Induction Stove in Kitchen

There are tricky spots on a glass stovetop. When sauces or milk boil over, there may be a hard stain that occurs.

There does not appear to be any cleaner that takes it all off. For this, you need a prison shank or the safer version, a razor blade.

Get a holder for the blade. You will be less likely to need sutures or amputation after your cleaning. 

Scrape at a 45-degree angle and scrape lightly. If it’s stubborn, then go over it several times.

You’ll probably see it flake off in small pieces. Expect to see this. Then, use your vinegar spray or one of your cleaners to wash the remainder away. 

The general complaint about cleaning glass anything is streaking! You don’t have to let that worry you. 

For a streak-free shine, make sure you have the right cleaner and tools. 

If you see streaks on your glass stovetop, you may have more grime than you thought. It may be that more than one spray and wipe is needed. 

Try a little vinegar to break through first; or, do a second round with whichever cleaner you’re using and buff with the soft cloth. 

Other Glass

A window above a kitchen sink

Besides this stovetop that occupies all of your thoughts, what other glass items do you clean in your kitchen? Do you have windows, tabletops, cabinet doors, or more? Your sister (or you, if you can’t talk her into it) can use most, if not all, of the tricks listed here on all of these! 

The TLC Cleaning Team

The TLC Cleaning team of trainers

The TLC Cleaning Team knows what it’s like to want to do it all. Started by a young single mother, they strive to do their very best. They want you to understand how to take care of your home the way they will. They also know that you have so much more to do!

Get back to doing the things you love and let TLC do the cleaning! Call for a free quote today!

Categories
Kitchen

Pesky Pests: Learn How to Get Rid of Fruit Flies For Good

Read this article and learn how to get rid of fruit flies. A closeup of fruit flies on a slice of banana.

You go to your kitchen sink for a glass of water, and suddenly a swarm of pesky fruit flies appears swirling around your head. Now you’re thinking, “I wish I knew how to get rid of fruit flies!”

So how do you kill fruit flies? You may hope tossing the overripe or rotting fruit will solve the problem, but there are additional steps you should take.

A clean home is vital if you want to get rid of fruit flies. Having a cleaning company for recurring visits will help in the prevention of a fruit fly infestation. TLC Cleaning knows how to get rid of fruit flies! Service areas include Fargo and Grand Forks, North Dakota, and Detroit Lakes, Minnesota.

Having a little knowledge of fruit flies goes a long way in preventing an infestation and dealing with existing insects. 

Where do the Fruit Flies Originate?

How to get rid of fruit flies. Fruit flies on many oranges.

The misconception here is they come in with your grocery store fruit or produce. Fruit flies usually make their way into your home from outside through open windows and doors when they get a whiff of the delicious ripening, overripe, or mostly rotten fruit on your kitchen counter. Fruit flies are attracted to fermentation, so beer and wine also seduce the little buggers!

Fruit Flies, Explained by The Old Farmer’s Almanac

Fruit flies eating a piece of fruit.

The Old Farmer’s Almanac explains that the tiny insects are part of a large family of small flies with about 3,000 species. Compared to disease-spreading houseflies, fruit flies are relatively harmless. Other than fruit, they will live and breed in drains and garbage cans, and anything damp.

Fruit flies range in color from a light tan to a reddish-orange and brown. In liquid, they will almost look almost like swimming coffee grounds.

Having TLC Cleaning get under the refrigerator for spilled juice or milk or discover a forgotten potato under your counter will take away the larvae’s breeding grounds. If you want to know how to get rid of fruit flies, start with a deep clean.

Here is a fun fact, fruit flies can lay 500 eggs at a time! And in about 30 hours, the larva then surfaces and nourishes on the nearby fruit, developing into pupae. A week later, they are souring freely around your house and will lay their eggs. 

The fruit fly only has a two-week lifespan but can do a lot of breeding. The cycle will continue without taking the proper cleaning precautions and removal steps. 

What Are the Trouble Spots for Fruit Flies?

A sink full of dirty dishes. How do you get rid of fruit flies? Clean up troublesome food mess.

The biggest enemy of a fruit fly is a clean surface and a house free of spills, stains, and crumbs. Yes, overripe fruit is a big culprit, but so are garbage cans, garbage disposals, open vinegar or wine, or even whiskey bottles (and it is a sad day having to pour out a bottle of your whiskey because of the little buggers).

The Food Network recommends the following tips on how to get rid of fruit flies:

Toss the Fruit:

  • Get rid of infested ripe fruit and vegetables that are out in your kitchen.
  • Wrap up in a bag and securely fasten.
  • Bring to your outdoor trash can.

Clean the Fruit:

  • Wash uninfested produce in warm water and blot with a paper towel, allowing them to dry completely on a clean surface, as their eggs may be on the surface.
  • Put in a sealed container and refrigerate.
  • Gently scrub with a clean vegetable. Brush more rigid-skinned fruits such as apples, potatoes, melons, and bananas. 

Wipe Everything in Kitchen, Bathroom, Family Room:

  • All kitchen surfaces need a good washing down, as there may be eggs. 
  • Clean your refrigerator, tables, counters, and especially the sink drain and garbage disposal with a disinfecting spray (preferably food safe).
  • For sinks, use rubber gloves, and spray a paper towel with disinfecting spray. Use the paper towels to wipe the entire sink.
  • Check other house rooms, family rooms for hidden juice boxes, bathroom for dried toothpaste, basement for forgotten beer cans.
  • Take the trash out and clean the inside (including under the lid) and outside of your trash can.

As mentioned, the sink drains an often forgotten place. Keep continually free of food bits and clean all the icky buildup in and around the drain. It will become a breeding ground in no time!

Other suggestions on how to get rid of fruit flies include using overhead fans or portable fans. Fans will bother the fruit flies. You may also want to check screens and windows for holes or gaps and have them repaired or use caulk to fill. 

Airborne Fruit Flies Must Die!

Learn how to get rid of fruit flies with a homemade trap. Fruit flies trapped in a vinegar trap.

After a rigorous cleaning by you or TLC Cleaning, it is time to attack the mature fruit flies. 

The basic premise here is to attract the fruit flies and drown them with homemade fruit fly traps. Set up bowls of glasses filled partway with apple cider vinegar, red wine vinegar, or even leftover red wine. 

The Old Farmer’s Almanac instructs to cover the containers (bowls, glasses, wine glasses, etc.) with plastic wrap, a plastic baggie, or aluminum foil and poke holes in it. Make sure it is secure around the sides (a rubber band works great). Use a toothpick to poke holes, as you want to get the fruit flies in but not get out.

Another suggestion on how to get rid of fruit flies is to try the “bowl and soap trap.” Fill a bowl with apple cider vinegar, but add a few drops of dish soap and leave it out uncovered. Warming the vinegar first will make it more aromatic and inviting to the fruit flies.

Why the soap and no cover as with the other methods? The soap decreases the surface tension, and landing fruit flies then drown. 

Tip: No plastic wrap or aluminum foil? Use several pieces of paper and roll them together into a funnel and tape. Put the funnel inverted into each filled glass. Flies will get in and have nowhere to escape. 

If You Want to Know How to Get Rid of Fruit Flies, CALL TLC Cleaning!

Get rid of fruit flies in your home with regularly scheduled cleanings. A cleaning company employee wearing rubber gloves and smiling in a clean, white kitchen.

Nobody wants fruit flies in their home. TLC Cleaning helps prevent the problem in the first place by cleaning the hard-to-reach spots for you. A clean house uninvites the fruit flies. 

Keep your mornings peaceful. With the help of TLC Cleaning, you won’t have to worry about picking up a cup of coffee and seeing black dots floating in your cream!

Categories
Bathroom Deep Cleaning

How to Clean a Shower Head

A person holding a showerhead on a yellow background

What do you do when you want to feel squeaky clean?0 Hop in the shower! For most of us, a long, hot shower is the height of luxury and offers that all-important me-time. 

But, before you drift off in a lather of sweet shampoo, consider this; when was the last time you cleaned your shower head? Think of it this way: would you clean your floor with a dirty mop? Your car with a dirty rag? It’s doubtful! So then why would you cleanse your body with a dirty shower head? 

Maybe you have been putting the chore off for being too complicated? Or it just genuinely never occurred to you? 

Here at TLC Cleaning, we make it our mission to impart wisdom to those looking to transform their homes. Even better, we can offer the ultimate first-class deep clean to get you started. Our team has transformed houses and worked with families all across Fargo & Grand Forks, North Dakota, and Detroit Lakes, Minnesota, and we’d love it if you were our next client.

Whether you are a keen cleaning fan or just discovering your love of scrubbing, we are here to help. Read on for your ultimate guide on how to clean a showerhead with finesse. You can enjoy a squeaky clean shower head in no time!

Why Do Shower Heads Need Cleaning?

A close-up of a dirty showerhead

Showerheads can be easy to overlook in your cleaning routine because the majority of the dirt is hidden. Unlike the rest of your bathroom or shower curtain, grime is not immediately apparent, and so easy to neglect.

A dirty showerhead can cause several problems – apart from merely being gross. Over time, organic matter and mineral deposits will develop in the head. The build-up can hurt your water flow and pressure. This can lead to a drop in pressure or sudden, random spray patterns – neither of which is conducive to a great shower.

As well as problems with your pressure, neglecting your shower head can also be bad for your health. By their very nature, showers exist in hot, humid conditions – the ideal breeding ground for mold, germs, and bacteria. 

The mineral build-up we discussed can cause a nasty slime to build up, and this forms a seal over the head. As a result, any irritants and unwanted shower visitors stay trapped in the showerhead. When cleaned, the flow helps ensure that they are flushed out by chlorine in the water when you run the shower.

According to recent studies, a whopping 30% of all showerheads in the US contained alarming levels of Mycobacterium Avium. This is a fancy name for a pathogen, often associated with pulmonary disease. 

As an added not-so bonus, Stenotrophomonas maltophilia can also be present. It is a bacillus that thrives in that black gunk you will see around your showerheads. Left untreated, it may spread infections. Microbes run free when you turn on the hot water, making it easier for you to inhale.

If risking your health isn’t enough, take our word for it: a dirty shower is grim and unlikely to win you many friend points.

How Do I Clean My Shower Head?

Professional handyman working in shower booth indoors

Your routine will depend mainly on the type of showerhead and the current level of build-up and grime. As a general rule, experts suggest that showerheads should be cleaned thoroughly at least once a month. Additionally, a quick scrub should happen at least once a week.

To get started, you need to rub the nozzles clean gently. You can either use your finger or go in with an old toothbrush. The goal is to massage the nozzles, allowing the debris to dislodge, and enable excellent streamflow to come through.

What About White Vinegar?

White vinegar and cleaning supplies

White vinegar is a fail-safe ingredient in many cleaning tasks, and it shines here once again – this time quite literally. The vinegar contains acids perfect for breaking down the rust, limescale, and mineral deposits. There are a few tricks to try here:

The Plastic Bag Method

Plastic bag on a colorful background.

For a fast, effective method that does not require removing the entire shower head, the plastic bag is perfect.

This method involves filling a plastic bag with white vinegar and tying it onto the showerhead. Once in place, secure it in place with twist ties or an elastic band. Leave it for a few hours to soak – or overnight, if possible – before removing the bag. When removed, run the hot water for a short while to remove any debris which remains.

If any debris or stains remain, you can remove them by gently scrubbing with an old toothbrush.

The Complete Removal Method

Someone removing a showerhead to learn how to clean a showerhead

The best method for a shiny shower head is to totally remove and dismantle the showerhead for an in-depth and thorough clean. Submerge the pieces in a bucket of warm water mixed with white vinegar for at least three hours – overnight is best.

Once again, you can use a toothbrush to scrub off any stubborn stains or marks and clear the holes of any debris. Once complete, give everything an excellent rinse with clean, hot water before reassembling and replacing the head.

The Extra Touch

a illustration of a box of baking soda

For a sparkling finish, add baking soda to your white vinegar mixtures above. This combination kicks off a chemical reaction, causing the vinegar to bubble and form carbonic acid.

Carbonic acid is a top-quality natural cleaning agent. It is handy for lifting off stains and adding extra shine to metal showerheads.

The Touch-Up

Someone cleaning a showerhead

One of the two methods above should happen every month to clean the head and remove any debris. Weekly, you will need to keep it touched up. An excellent condition can be easily achieved and maintained by spraying a white vinegar-based solution once a week. Why not keep it by the shower, and give everything a spray as you get out? Doing this regularly will help to save time and keep your shower head in tip-top condition?

Get The Perfect Finish

Someone in rubber gloves suing a microfiber towel to clean a shower

For the perfect finish, you need the perfect product. The Barkeepers Friend is the final touch to a super clean shower head that is worthy of praise. The vinegar and baking soda combo will keep you free of germs and unwanted visitors. Meanwhile, a rub of Barkeepers Friend offers the sparkle you need for a top-quality bathroom. Now it is time to enjoy your squeaky-clean shower in perfect peace!

 How Can We Help?

A professional cleaning service cleaning a bathroom

Getting your showerhead clean as a whistle is an excellent start to sprucing up your home, but why stop there? Here at TLC Cleaning, we can take care of your house from top to bottom, offering the ultimate deep clean. 

A clean showerhead can be a great starting point and make it far easier to keep on top of day-to-day housework. Alternatively, get ready to host visitors, show your home for sale, or just sit back and enjoy that clean feeling!

Get in touch today, and see how our team could take your home from dive to deep clean in no time. You can just put your feet up, kick back, and relax!

Categories
Deep Cleaning Dusting Floor Care

How to Clean Baseboards

Someone wearing a pink glove cleaning baseboards with a microfiber cloth

You’ve lost your remote for the TV again; while you’re on all fours looking for it, you look over and go “ew.” Yep, dirty baseboards. Baseboards are one of the most frequently overlooked places within the home. Knowing how to clean baseboards is an often-overlooked skill, but let me tell you, those things are dirt and hair magnets!

If you have pets and live in an area where there’s a lot of dirt and dust, you should strive to clean them weekly. However, if you’re flying solo and keep your home pretty clean, you can feasibly get away with cleaning them every month. 

Or maybe cleaning baseboards isn’t your thing. If that’s the case, give TLC Cleaning a call. With locations in Fargo and Grand Forks, North Dakota, and Detroit Lakes, Minnesota, TLC Cleaning can provide you with a quote to schedule either a one-time cleaning, deep cleaning, or recurring cleaning service. 

Keep reading to learn how to clean baseboards quickly and efficiently in your home.

First, Prep the Area

A professional cleaner using a yellow vacuum to clean an area rug

You’ll want to pull the furniture away from the walls. Sweep or vacuum the floors to make sure you have most of the room’s dust and dirt. This step is also a great time to grab a friend or one of your children if they’re old enough to help out. Working together will make moving the furniture moving easier and the cleaning process faster. 

Now let’s talk about different techniques to use and how to clean baseboards. 

Broom Technique

A woman smiling and holding a broom and dustpan against a pink background

Using a broom to dust the baseboards is excellent if you already have the broom handy, and they’re only a little dusty. You may have to do a quick vacuuming after to clean up any dirt on the floor. A handheld broom works best for getting in the crevices. Another way to clean them is if your vacuum cleaner has one of the hose attachments with a brush.

Vacuum Attachment Technique

A man cleaning baseboards with a vacuum attachment

As previously mentioned, a hose with a brush attachment is an excellent tool to clean baseboards. Using a vacuum cleaner attachment to clean baseboards is less strain on your body. Brush attachments work the best when vacuuming the dust and dirt from the cracks and crevices. 

Lysol Wipe Technique

Lysol disinfecting wipes canister isolated against white background

Using a cleaning wipe is an easy and quick way to bust baseboard grime. It can be an effective method for small homes. On the down-side, this method costs more money in the long run and can be quite wasteful. We suggest saving them on-hand and using them to disinfect door handles and frequently touched surfaces. But, in a pinch, disinfecting wipes will work just fine to clean your baseboards. 

Dryer Sheet Technique

Someone adding a dryer sheet into a dryer

Do you have a box of dryer sheets lying around? You can grab one of them and attach it to the end of a Swiffer and swipe it along the baseboards. The anti-cling properties of the dryer sheet will repel dust. Now you can go a little bit longer between cleanings. 

If you use scented dryer sheets, you’ll leave a pleasant, fresh scent behind, too.

Magic Eraser Technique 

A stack of Magic Erasers on a pink background

Grab your magic erasers and a bucket of warm soapy water. Really, you can use your choice of household cleaner with water. Use the damp sponge to scrub the dirt from the baseboards.

Wring out any excess water so the baseboards have a shorter dry time and won’t leave water stains. 

You can easily tackle any other wall or floor scuffs with this technique while you’re cleaning your baseboards.

Try the Magic Eraser Sheets to avoid a crumbly mess from the sponge.

Sock and Yard Stick Technique

Woman holding bright sock and space for design on color background

Yes, it sounds a little silly, but it works. Slide an old sock on the end of the yardstick and spray it with your preferred household cleaner (or even a vinegar and water mixture). Slide the sock across the baseboards to pick up loose dirt. Then, simply toss it in the wash to use it to clean again later.

If you have dark-colored socks, they may still be wearable after using this method. Although, it may be best to have a stash “designated cleaning socks” instead.

Tried and True Technique

Hand in rubber protective glove with microfiber cloth cleaning baseboard on the floor from dust at the wall. Early spring cleaning or regular clean up. Maid cleans house.

First, grab a rag (we recommend microfiber) and a bucket of warm water with your choice of cleaner. Then, get on your hands and knees and start scrubbing. The microfiber cloth helps pick up and lock dirt into the rag. Clean Mama has an informative post on how to clean white baseboards using natural solutions. Take a peek if you love cleaning tips and eco products. 

For an extra level of clean, use q-tips to get all the edges, corners, and detailed areas. This technique is through and is useful if it’s been a while since you have washed your baseboards. Once they’re sparkling clean, you can use some of the other less-involved techniques to maintain them. 

A Deep Clean You Can See

A smiling cleaning crew

Baseboard cleaning comes with every seven-hour Deep Clean Package from TLC Cleaning.

When you schedule a deep cleaning, you can expect your baseboards to be wet washed in every room of your home. 

With a Deep Cleaning Package, you can also expect dusted light fixtures, hand washed floors, dust-free door frames, deep cleaned blinds, and even a good old-fashioned trash can scrubbing.

Check out a full list of everything included in a TLC Cleaning Deep Clean Package by clicking here.

Stop Asking How to Clean Baseboards, Call TLC Cleaning Instead

Professional janitor cleaning baseboard with brush after renovation

Now that you know how to clean your baseboards, consider giving yourself the break you deserve. 

Contact TLC Cleaning at the North Dakota or Minnesota locations so we can clean some of those harder to reach spaces, like your baseboards. Get your free online estimate and bid unwanted baseboard dust “bye-bye!”